|
12/19/08


Kits
Retrofits
Parts
|
|
|
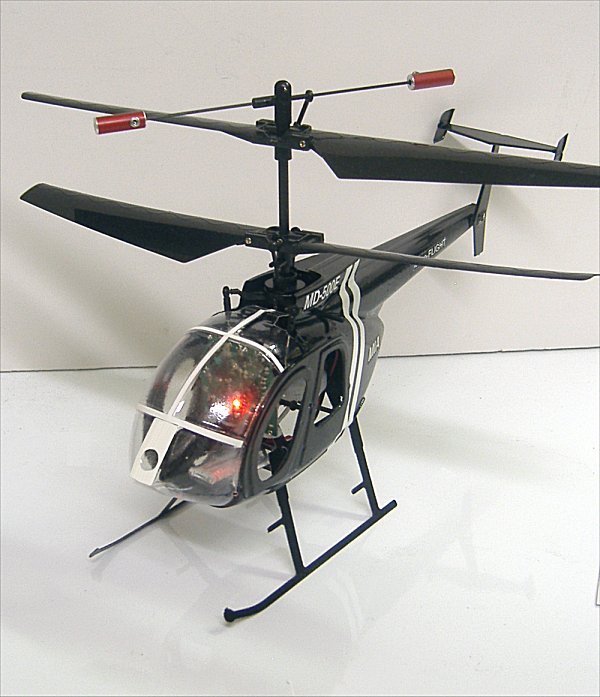
MIA MD 500E - Blade MCX Heli
Landing Gear, Stabilizer and Body assembly and
Installation Instructions
|
G10
Parts Tree
- has two "A" shaped
- strut and battery bracket support arms and two Struts
with skids.
|
Kit Parts |
 |
Light
Plastic Scale Body Assembled (with front access for
installing mechanics and bottom access for LG and
Battery installation) |
 |
Clear Front
Window (attaches to bottom of Body with tape) |
 |
Light
Plastic Stabilizers (requires assembly with CA Glue)
|
 |
G10
Fiberglass Lightweight Landing Gear (requires assembly
with CA Glue) |
 |
Thin Vinyl
Decal sheets for stripes numbers and Logo (cut , peel
and apply) |
|
- 1) Gently remove the stock plastic
landing gear from MCX frame.
2) Carefully break off the G10 landing gear parts from
the G10 parts tree.
3) Assemble the G10 (fiberglass) "A" arms/battery
support brackets to the struts by, first, test fitting to make
sure struts to "A" arms support install square, then glue with
medium viscosity CA glue to form the A-shaped Landing Gear
assembly.
4) Gently trim the rear "A" arm G10 battery
support area bracket to remove weight.
5) Trim the Vertical and horizontal stabilizer parts
that match the supplied body and assemble with medium
viscosity CA glue. Make sure the stabilizers and wing tips are
glued nice and square as in the photos.
6) Install new stabilizer assembly with CA glue to the
body at the rear of the boom. Note the boom has a small raised
rectangular key, this is for the matching molded pocket on the
vertical stabilizer, so aligning and gluing is easier.
7) Install the MCX frame/mechanics from the front of the
body, by inserting one side of the mounting stock canopy
support upper arm first, then the other one, you will need to
carefully open the front of the body to do this. You do not
need the lower canopy support arms since the G10 Landing Gear
assembly will hold the frame in place.
8) Install the G10 Landing Gear assembly from the
bottom by carefully inserting the G10 landing gear assembly
top mounting pegs into the stock MCX plastic frame's landing
gear support. Do Not CA glue! if the fit is loose, use
Elmers rubber contact cement instead to provide a "sticky"
retaining press fit. You want to be able to remove the LG and
the contact cement allows this.
9) Install the front window using a small piece of scotch
tape or a piece of the vinyl decal material to hold the window
in place at the bottom of the front body, the top of the
window gets tucked inside the top of the body like in the
photos.
10) Carefully trim the vinyl decal stripes, numbers and
logos and apply using the photos as reference. The vinyl
decals have a special adhesive that allows them to be
repositioned easy so if you miss aligning the decals the first
time, simply lift and reposition. Make sue the surface is
clean and dry before application of decals. You can use 1/16"
wide strips of decal material to do the window framing.
|
 |
 |
 |
 |
|
|
|
Home | Products | Testimonials | Services | Museum | Information | Feedback | Contact Us
This site was designed, developed and is managed by Mario I. Arguello. Last
updated
12/19/08
MIA
Micro-FLIGHT™, MIA Designs™, Palm-Size™, Finger-Size™, TUFF™, Pilot Figures
with Swept-Back Hair, are trademarks owned by Mario I. Arguello
All Rights
Reserved.
©
Copyright 1999-2008 Mario I. Arguello
Web Site Content, Product Specifications,
Product Availability and Prices are subject to change without notice.

