|
10/31/08


Kits
Retrofits
Parts
|
|
|
MIA Upgrades Phantom and Edge Pro Kits - Blade
MCX Heli
Landing Gear, Stabilizer and Canopy assembly and
Installation Instructions
|
 |
Kit Parts |
 |
Canopy |
 |
Stabilizers |
 |
2 G10 CNC Machined
Strut Supports |
 |
1 G10 CNC Machined
Battery Holder |
 |
2 Aluminum Skids |
 |
2 Battery Support Bands
|
|
-
- 1) Gently
remove stock plastic landing gear from MCX frame.
-
- 2)
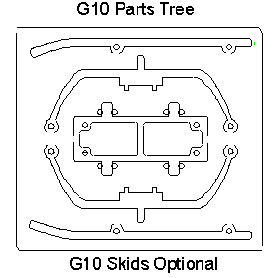
Carefully break off the G10 landing gear parts from the
G10 parts tree.
-
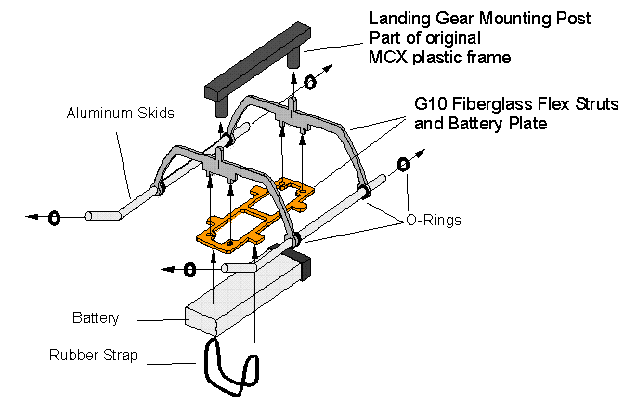
- 3)Assemble
the new MIA G10 (fiberglass) battery plate to struts by
first test fitting plate to make sure it installs flush
with bottom of strut support pegs, then glue with medium
viscosity CA glue.
-
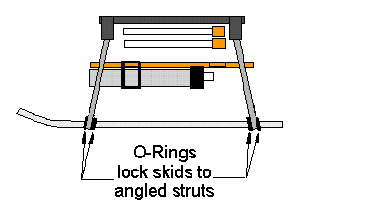
- 4) Gently
Insert Aluminum Skids into Struts with O-Rings. Angle the
struts a bit to press against the skids, then lock with
the O-rings, as illustrated. No need to glue.
-
- 5)
Carefully insert the new landing gear assembly into the
plastic frame's landing gear support. Once installed it
remains installed with pressure. Do Not glue!
-
- 6) Trim
the Vertical and horizontal stabilizer parts that match
the supplied canopy. and assemble with medium viscosity CA
glue. Make sure Stabilizer is glued nice and square.
-
- 7) Remove
original MCX large vertical tail fin and install new
stabilizer assembly with CA glue.
-
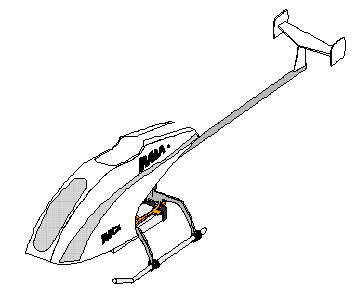
- 8) Mount
Canopy to rear canopy support on the MCX frame.
|
 |
 |
 |
| Trim
and finish canopy, stabilizers with MIA Decals |
|
|
|
Home | Products | Services | Museum | Information | Feedback | Contact Us
This site was designed, developed and is managed by Mario I. Arguello. Last
updated
10/31/08
MIA
Micro-FLIGHT™, MIA Designs™, Palm-Size™, Finger-Size™, TUFF™, Pilot Figures
with Swept-Back Hair, are trademarks owned by Mario I. Arguello
All Rights
Reserved.
©
Copyright 1999-2008 Mario I. Arguello
Web Site Content, Product Specifications,
Product Availability and Prices are subject to change without notice.