|
06/30/12

 |
|
|
- Blade mCPX Upgrade Product
Instructions
-
- MIA MD500E Scale Body and LG Kit
-
- Based on our Original MIA
Palm-Size ™ MD500E
Scale bodies but
- now completely redesigned and
customized MIA MD500E Scale Body-LG kit
- for the awesome Blade mCPX!
-
-
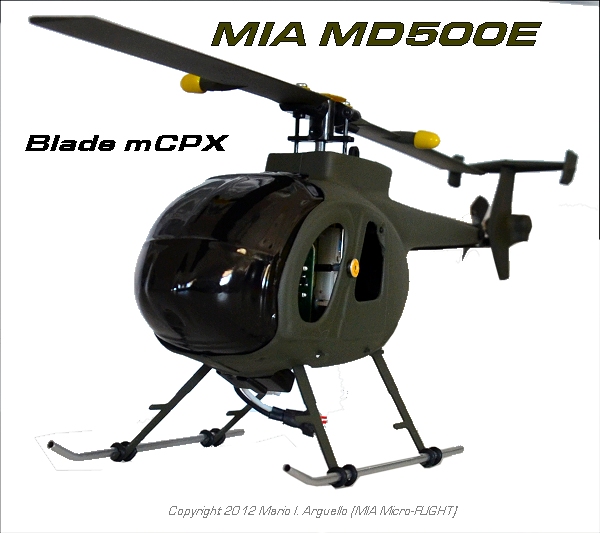

- Note that the MIA BGS (Blade Grip
Safety) Device is not part of the
- MIA MD500E kit, but was previously
installed from a MIA Phantom Combo Kit.
- We left it in place because it just
looks better. Many of MIA customers may already have the BGS, as
part of the MIA Phantom kits, but if not, and you wish to have
same look, you can purchase the MIA BGS Kit separately,
- from the MIA
Upgrades -mCPX section.

-
-
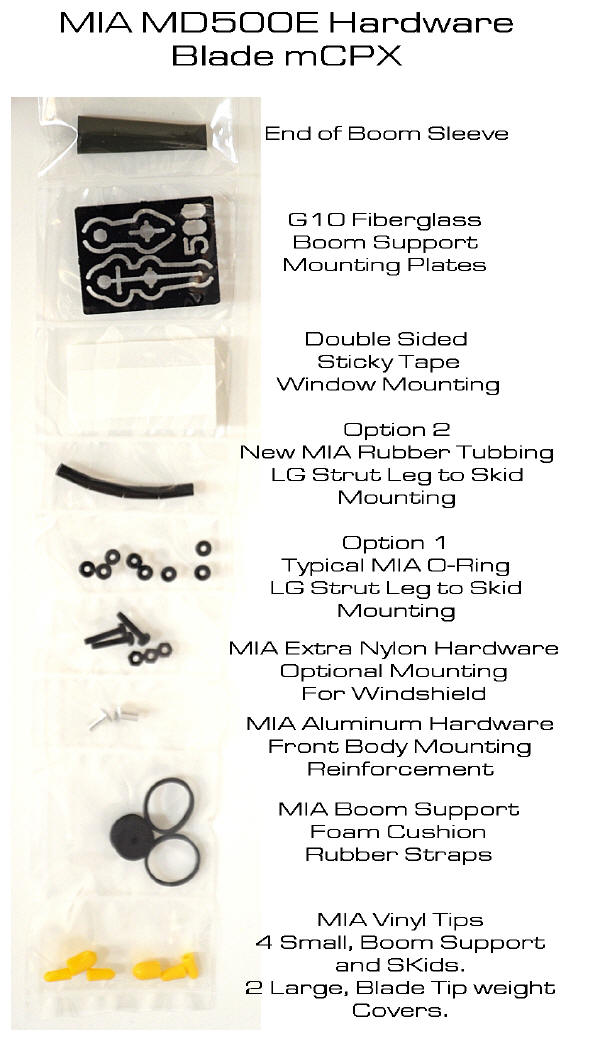
- The Boom Support G10 Mounting Plates and
the yellow vinyl tip boom sockets
- mounting method (NOT GLUED, but press
fit) were a necessity for the scale body
- to fit and look correctly. Otherwise the
stock boom location sits too low
- and does not allow for a good fit of the
body.
-
- The body is a true representation of the
MD 500E
- and we wanted this to look right on the
mCPX, so this relocation of the
- boom was required for a realistic, clean
appearance as in the finished product photos. This method
also allows the boom be located back to stock position, if needed.
-
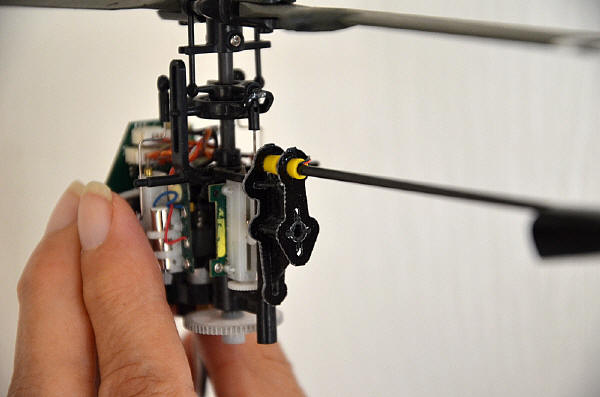
- Note that the distance of the boom,
where the wires come out near the
- front yellow tip socket is about 3mm ,
this sets the boom length to a good distance for the body and boom
sleeve to fit correctly. But additional tweaking may be required
during final stages of assembly.
-
- Doing a scale installation such as this
one, requires a bit of patience and care must be taken during this
stage to ensure you do not fray the wires. You should test the
operation of the tail before mounting the body to make sure
everything is working properly. If not go back and check all the
wring connections and correct wiring problem is necessary.
-
-

-
-
-
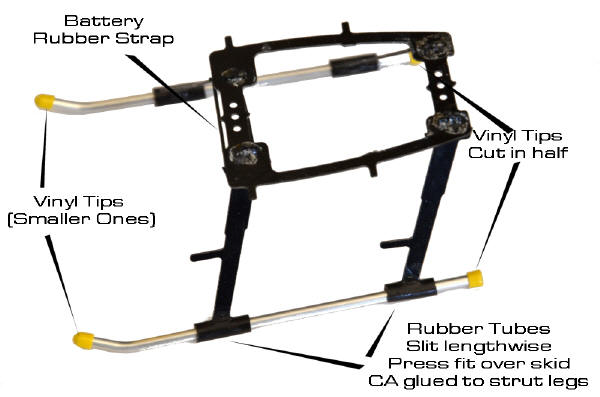
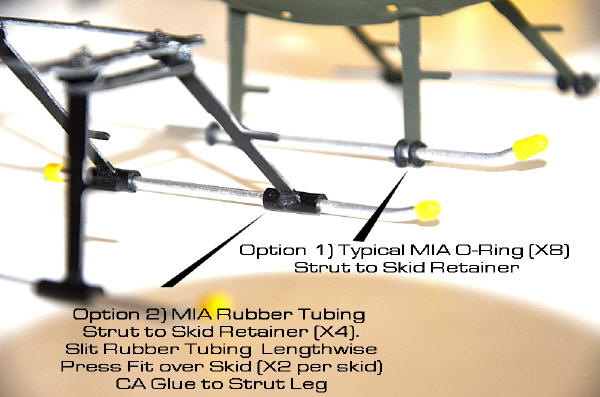
- Please also refer to the
MIA MD500E - mSR section for the LG
assembly
- and Body installation, it is basically
the same.
- Otherwise, follow the rest of the photos
in this section for the mCPX.


-
-
-
-
-
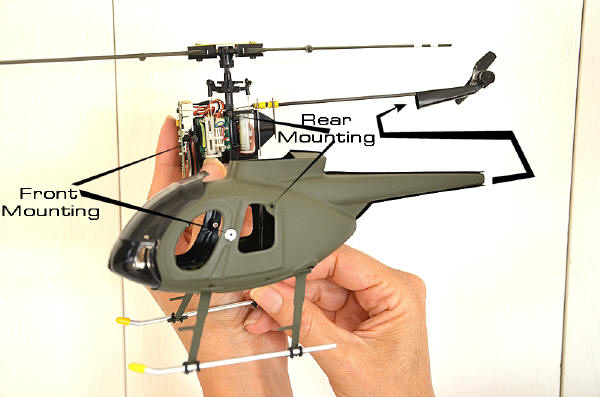
- Install the body by opening gently the
tail boom section and sliding it
- over the helicopter frame and boom
assembly.
- You will need to push the body slightly
and gently towards the front
- to allow the tail boom sleeve to slide
over the end.
- If you find the fit a bit tight,
carefully trim 1/8 inch or 3mm from the end of
- the scale body tail section to allow the
tail sleeve to slide easier. Use the 2 aluminum spacers to mount
the body to the front canopy mounting bar, this sets the
appropriate distance from body to mounting bar and retains the
body better.
-
- NOTE: it is easier to mount the body to
the heli frame first,
- then the LG assembly to the body 4
mounting perforations. You will need to open the body bottom
gently and carefully insert the 4 LG mounting pegs inside
the body LG mounting perforations, this retains the LG to the
body.
-
- The windshield is installed last with
either the supplied double sided tape
- small section at the top and front
bottom of the cabin. Or you can customize with the small nylon
hardware supplied in the kit. We leave this option open to the
user. You will need to make small tiny holes for the hardware. Use
care in drilling the holes through the body and windshield, you
can use one screw and nut at top and one at the bottom to hold the
canopy to the body more securely than the tape but in all our
previous MD500 installations the tape has been sufficient and
maybe easier for some users.

-
-
-
- The tail vertical-horizontal tail
stabilizer assembly is also same as for
- the MIA MD500E
-mSR.
- and the assembled tail stabilizer is a
final press fit over the tail motor
- via the vertical stabilizer molded
socket.
-
-
-

-
-
|
|
|
|