- MIA UPS™
Universal Palm-Size Heli Frame.
-
-
Version 1 and Version 2
-
- PLEASE
NOTE There are two versions of the MIA UPS frames.
The assembly is the same for most of the frame
construction, except for the main shaft bearing
blocks and LG.
- Version 1 -
had G10 fiberglass bearing blocks, and metal spacers for
the LG.
- Version 2 -
most recent, has the white square plastic Telescopic
tube bearing cups and the LG does not require the metal
spacers since the LG struts are glued on.
- The reason
for making Version 2 was to provide an easier bearing
block for the user and Lighter LG.
- Please study
the photos and test fit all parts first. Make sure you
understand how they go together before Gluing with CA
glue. The assembly photos are self explanatory but
if you have questions, please email us for
clarification.
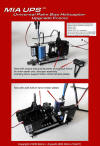
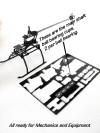


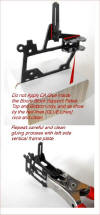
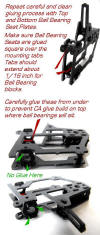
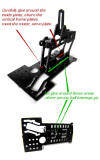


Version 2
This Kit is
latest and is supplied with pre-assembled bearings blocks to take the Walkera
4G3
ball bearings. There are
some extra white square blocks in the kit, in case you wish to do your
own bearing blocks, for
other size ball bearings, such as for the Walkera 4#3, this would be
useful if you plan to use
this frame for a full brushless 4#3 B conversion or similar.
The options with the MIA UPS™
frame Kit are many. With some imagination it can also work with
other similar small size
helis, such as the Walkera CB100, or the Walkera 4G6- 4#6 with a brushless
motor on the tail.
Note that the 4G6 and 4#6
helis are driven by gears via a torque rod through the boom,
Walkera did this after doing
the motorized tail version with the earlier 4G3, but many people may
find that the geared drive
for the tail, as on the 4G6 and 4#6, is more troublesome to tweak and
repair, and thus one can
convert these back to BL direct drive tails with the MIA Frames for a more
robust and easier to
maintain setup.
I started designing small
electric helis, more than 25 years ago with motors on the tail
because of the simplicity
and ease of maintenance this particular setup offers, especially for
beginner pilots or just
anyone that wishes a more simplistic and easy to maintain setup. The MIA
Robin 280 kit was one such
early kit and several other MIA sizes, which I designed afterwards,
employing a motor on the
tail. Similar configurations followed by other companies for the same
reasons as I described
above. I still prefer motorized tail rotors vs. mechanically driven
tails on
these small Palm-Size helis.
But it is hard to realize the pros and cons of each particular setup,
mechanical vs. motor driven
tails until one tries several RC helis in various sizes and configurations.
Please keep in mind that
today's light-weight technology is offering a lot more in terms of power and
control than it did 10 years
ago. A good BL tail motor coupled with a high resolution, high precision
ESC will provide precise and
instantaneous tail control. In addition, all the MIA Frame Kits are
designed with longer and
more robust booms to add additional natural counter torque control an
minimize work on the tail
section. In many of MIA early G10 frames for the Walkera 4#3, for example,
you could, and still can,
simply go direct drive with a regular stock or BL tail motor, similar applies to
the MIA UPS™
frames.
Properly Dressing 4G3 Servos
The Walkera small servos are great, but being that the cases are simply snapped
together with pins, there is the possibility for servo's case to become loose
with use.
To resolve this, follow the tip below, before installing servos on the MIA
upgrade frames , can also be done with the stock frames to clean up the servo
installation and wire routing.
Use a thin band of heat shrink tubing around each servo, in particular the two
rear servos as these have the longer wires. You can use the
MIA Servo Heat Shrink Tubing Kit (in colors) developed for this purpose.
Study the following photos, note how the wires are routed, try not to make sharp
creases in the wires but gentle small radii bends, this allows for a clean
setup.
The New Ball Bearing
Block Details
Some details on the new bearing
blocks, in the development of the MIA UPS™ frames, I
struggled a bit making a final decision on the the final look of the frames,
because the original MIA Upgrade frames had 3/16" square ball bearing blocks
that worked well with the 4#3 smaller main shaft ball bearings, but because the
the 4G3 has larger ball bearings it requires a much larger bearing block.
I didn't want to change the width of the frame support blocks which are also
3/16", because these work perfect with the required location of the 4-3 servos,
both in the Fixed Pitch and CCPM setups. But I needed a way to allow for the use
of larger ball bearings for the 4G3 without disrupting the standard separation
width of the main frames upper vertical plates. I also wanted total versatility
in using the same frame with 4#3 mechanics and other similar size helicopters.
My solution for the ball bearing cups, was to not use the G10 fiberglass ball
bearing pieces as in my original UPS design, Version 1, in previous photos
above, but opted to go with the telescopic white blocks to manufacture the ball
bearing cups for the 4G3 main shaft ball bearings.
Basically the original 3/16" square block , that is used in the MIA Flex and
Rigid original frames, sits inside a 1/4" square block, with ball bearing depth
set by the ball bearing thickness itself, this is separated into two ball
bearing cups, one for the top and another for the bottom. I am very glad I did
this with the white blocks, as described for the ball bearing cups, as this
worked extremely well.
In contrast, the MIA Flex and Rigid
frames come with a 1" long piece of 3/16" square tube with the bearing cups
pre-formed on the block ends, top and bottom.
Two small details I should point out,
the base of the frame as well as the top rectangular G10 plate act as
reinforcements for the ball bearing white block cups, so no need to ever worry
about the white pieces cracking, you can see this in the following photos. This
is probably the only area that I wanted to focus more on since the rest of the
assembly is pretty straight forward, especially if you are already familiar
building my earlier MIA G10 frames.


Because I did not want to increase the width of the frame's main vertical
plates, by going with a 1/4" frame separator main bearing as well as boom
support blocks, I elected to do some cut-outs on the G10 frame, around the ball
bearings, top and bottom, to allow the 1/4" block sections to clear, yet
maintain frame inside wall separation width at 3/16" which makes the
frames very slick, and with direct same G10 material tongue and groove pieces
for the boom supports. This allows the use of larger OD booms, 3/16" OD without
the need for the white square block boom reducers.
In other words, one need not use the white 3/16" blocs as in the original flex
and rigid frames but are supplied in the kits, anyway, as press fit boom
adapters. This means one can use a 3/16 tubular aluminum or carbon boom, or
smaller diameter as in the original 4#3s, or even the original square one in the
4G3. The kits do come with stronger booms as in the Flex and Rigid upgrade kits.
-
-
-
-
-
-
-