|
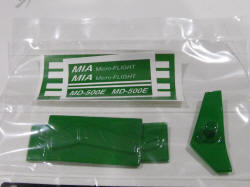
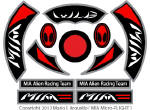
MIA Micro-FLIGHT Decals
MIA Vinyl Sticker Decals
•
Colorful • Versatile
• Repositionable


Applying MIA Decals is a very simple
process, but to obtain professional results, please take a moment to
read though this section.
About MIA CVRVS™
Decals
The name CVRVS stands for Colorful,
Versatile and Repositionable Vinyl Sticker, I thought this would best
describe our MIA Decals and so that is how that name was
born.
I am of the opinion that there is no
right or wrong way to attach decals to a model, especially "freestyle
design" ones (for non-scale applications), so long
as their layout flows with the shape of the item they are being applied
to, looks professional and most importantly, it makes the
user-viewer happy with the end result. For this reason, I elected to
design MIA decals with a versatile approach, so they could be
used in various applications and layouts, in a creative way, perhaps,
only limited by size of the model and user's layout
preference.
Our product photos with MIA decals
are only a reference, but a person can, for instance, cut the decals
strategically to allow a wider range of layouts and
aesthetical effect possibilities, within the specific area to be applied to.
Furthermore, both, the printed areas, as well as white unprinted vinyl
material can be used, creatively, to form other custom trimmings and
lettering.
From the simplest of MIA Decal
layouts using, for instance, white or single color, thin trim strips, on
dark color canopies, which works
exceptionally well on MIA Phantom™ carbon pattern canopies, to more
colorful and complex decal layouts, using color canopies and
bodies, the end result can be very satisfying, adding that especial
finishing, custom or personal touch to a model.
 
About the MIA Decal Material
The thin light weight vinyl into which MIA Decals are
printed is coated with a special adhesive which allows the decals to
be repositionable, without loosing its sticky properties. You can
reposition the decal a few times and the decal will still stick to a
clean surface, but we highly recommend that repositioning be kept to a minimum, no
more than 2 times, if possible. The thin vinyl medium also allows for the decal to be
installed easier around compound curves and crevices, by "slightly"
stretching it, much easier and best of all, will not tear, as a water
slide
decal does, if you stretch the material to much, during application.
Tips on Applying MIA Decals for
Professional Results
-
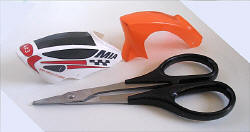
Tools Required:
-
Small
Scissors, Hobby Knife, Small Metal Ruler or Straight Edge, Cutting
Mat, Flat Table Surface, and some Soft non-coated Kleenex Tissues.
-
Before cutting, give some thought as to the final layout. If you
are simply applying the decals as per our product photos, then
just cut around the perimeter of each printed area to match or
product photo references.
-
Optionally, you can customize further, with a bit of creativity,
by studying the printed designs and the surface to be applied
to, then decide how the design layout would best appeal to your
particular taste. Remember, there is no wrong or right way to
apply freestyle design decals.
-
Once the decals are trimmed you can also play with the layout so
long as the backing material is not removed until final
application.
-
Most of MIA Decals have a wider printed border to match the same
color as the canopy or scale body, they are designed for. This
is to allow the user some room for cutting error, yet allow the
cut edges to blend with the color of the canopy or scale body.
This is not a hard rule, as in some cases, it may be desirable
to allow some contrast between the decal edges and canopy color.
But if you wish to stay within the same color as the canopy, try
to trim, cleanly, in the middle of this matching color border
for best results.
-
- We
try to keep the border color of the decals as close as possible,
to the canopy or scale body color, but in some cases the colors
may be slightly different due to printer, ink variations. We use
high quality printers and our own especial light protective
coating to further protect the printed areas.
Plan twice Cut once!
-
Applying decals with professional
results takes a bit of planning and patience. Use a comfortable
small hobby scissors to trim around curves. While you can also
use a hobby knife, with a sharp new blade, to carefully trim around
curves, it is preferable for straight line cutting, using a metal
ruler, as a guide. But which ever way you are accustomed to and
feels more comfortable, is OK too.
-
Please observe safety, at all times,
when working with hobby cutting tools.
Always cut away from your body
and hands.
-
For professional results, use a
quality cutting mat or flat stiff cardstock material, as a
backing, when doing cuts with a hobby knife.
-
Use a clean and flat table surface so
that straight cuts are clean and precise.
Surface Preparation - In this
case, it would be the plastic vacuum-formed canopy or scale plastic
body.
-
Although MIA Vinyl Decals can be applied directly to
the canopy or scale body plastic surface, without especial
surface preparation, it is recommend that the area to be applied
to, be cleaned lightly and gently with a dry soft Kleenex tissue
for better decal adhesion. Then, gently blow any light dust away
from the surface, before application of the decal.
This is desirable to remove any fingerprints and light surface
dust, which may be present during handling of the canopy or
scale body. Do not use cleaning solvents, as some will eat away
some plastics. Also try not to leave heavy fingerprints on the
surface of the canopy or scale body while preparing it for the
decals. Work with clean and dry hands.
Application to Surface
-
To peel off the decal from the
protective backing sheet, carefully poke with the sharp tip of a
hobby knife the corner of the decal backing and lift it, it should
peel gently away from the vinyl side. Once this is started, simply
peel off the rest of the backing material.
-
Try not to touch the
adhesive side with fingers too much.
Do not drop the backing material on
the floor and leave it there, as this material can be slippery.
Please dispose of it properly, as soon as it is removed from the
vinyl decal.
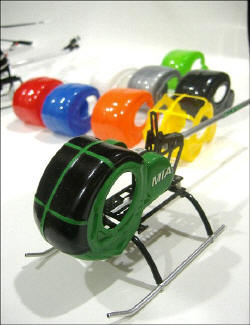
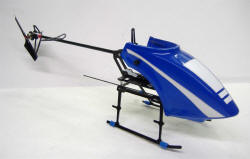
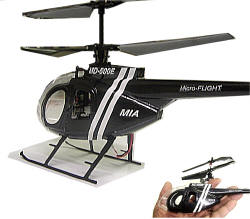
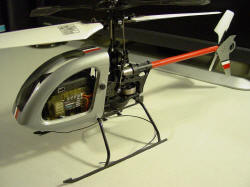
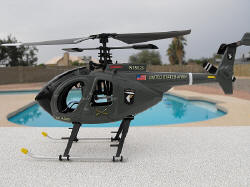
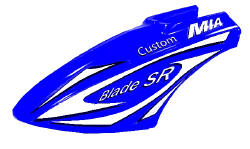
MIA Edge™ and MIA Phantom™
canopies for the E-Flite Blade 120 SR helicopter.
-
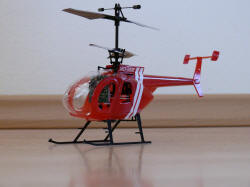
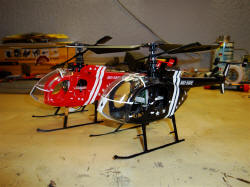
Apply the decal using our product
photos, at this site, as reference, or as you wish, for further
customization. The photo above, shows how the same decal,
but in different color, was trimmed around the windows area, to
produce a slight different aesthetical effect on each canopy. On
the MIA carbon pattern canopies, I like to leave the window
areas open, so that the carbon pattern shows through. This is a
personal preference and again, there is no right or wrong way,
go with what appeals to you the most and makes you happy.
-
If for some reason you missed the
target area, at first, simply lift off the decal, using the tip of a
hobby knife under a sharp decal corner and your thumb over the
printed surface, pull off gently and re-apply carefully and slowly,
starting at one corner and working
-
your way gently through the rest
of the decal area. Do not rub
off hard on the printed surface.
-
-
If required, use gentle blotting action with
fingertips, to flatten the decal on the surface. Also, it helps,
greatly, to plan the cuts and layout, earlier, so not to have to
cut the decals, once they are peeled from their protective
backing material, as this make cutting them, clean, very
challenging.
-
Applying MIA Decals around curved
surfaces
-
Although it is easier to apply thin
strips around curves by slightly stretching the material around
the curve area, in small increments, this is ideal for window
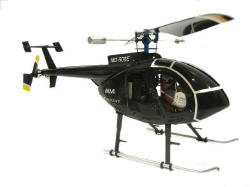
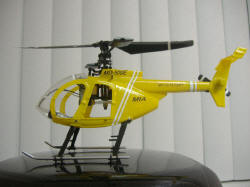
frame trimmings such as on the MIA S300 and MD500 scale body
windows and thin long decorative trims on the body sides or boom
section, wider decal areas will also conform to curved surfaces
by slightly tugging the vinyl material around them and working
to form around the decal area gently. Some examples are shown
below and throughout this page.

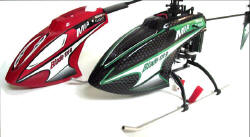
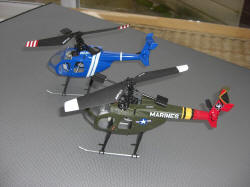
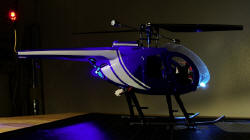
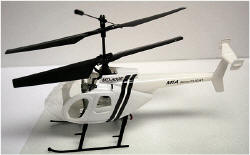
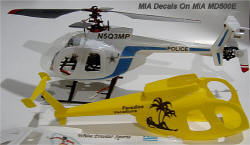
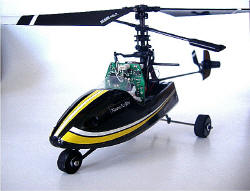
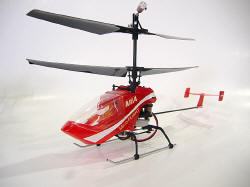
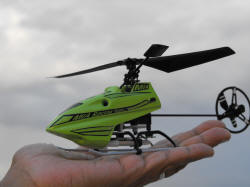
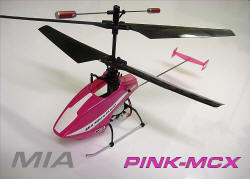
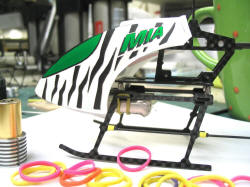
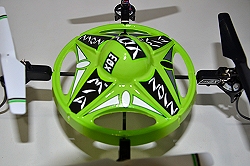
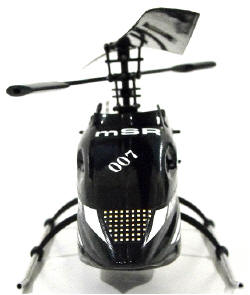
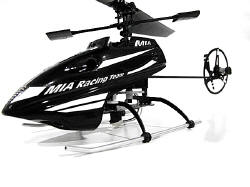
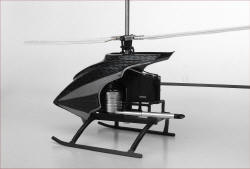
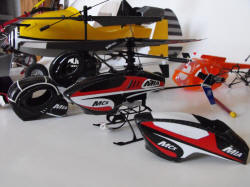
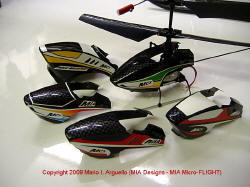
Custom Decal Applications on Various MIA Micro
Heli Canopies and Scale Bodies
Courtesy of MIA Customers

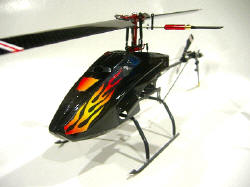
Simple Custom MIA Retro Canopy and Fin on a Hirobo
Quark SRB Helicopter
-
Additional Examples of MIA Decals applied to various
helicopter
-
canopies and bodies.


|
|