-
MIA Kit Introduction

Q. Why Build from a kit?
A. Building from kits allows the modeler or user to have full
control of the product assembly. MIA has tried to minimize
assembly complexity by making MIA Kits "tongue and groove"
with snap in parts that only require "test-fitting" and a
bit of CA glue. In many cases, you only need to snap
parts together and in some of our kits we incorporate
miniature hardware to make assembly even easier. Bear in
mind, though, that we are very careful about the use of
metal hardware (only as needed) because this can also add
unnecessary weight to some products.
Building from kits
provides a great deal of satisfaction that you are putting
it together. There is also quite a great deal of information
that can be learned from Kit Assembly. Many times, you can
customize the assembly to your needs and requirements,
or even fix it yourself, in the unfortunate event of a
mishap, such as when you are flying your specific model and
crash.
MIA TUFF™
Upgrades are very durable and almost indestructible,
that we feel very confident, you will not be repairing your
model helicopter, as often as you do with the stock OEM
parts the stock helicopter products come with.
Q. Who are MIA Micro FLIGHT Kits good
for ?
A. For anyone who truly enjoys building and flying miniature
RC helicopters and wants to indulge in the pleasure and learning of
building from a kit. Because MIA kits use
small parts and may include plastic, metal and composite
materials, the kits are not meant for children, but
preferably for mature Radio Control Model enthusiasts, who
have some knowledge of assembling models which use similar
parts made from similar materials.
Q. What Materials are MIA Micro-FLIGHT Kits made from ?
A. MIA kits are made from Computer Numerically Controlled (CNC)
machined Fiber-Glass or Carbon sheets, for things such main
frames, rotor heads, along with stainless steel shafts and molded
high strength co-polymer parts, for gears, rotor hubs, swash plate,
links, and landing gear, for the ultimate in strength and
durability.
Q. Do I need special skills to build and fly ?
A. No, if you are familiar with building balsa models and already
have some RC model hands on experience, MIA kits will be a breeze.
Q. How long does it take to build from a MIA kit ?
A. Normally
one evening, a few hours, or minutes even, depending on the
complexity of the kit. A landing gear kit for Palm-Size
helis, for instance, takes about 15 minutes. This also
depends on user skills.
Q. What tools and materials are required to complete a MIA kit ?
A. Standard RC hobby tools such as a hobby knife, scissors,
mini screw drivers, masking tape, ruler, medium viscosity CA glue, and CA
glue accelerator spray to help speed up assembly.

Q. How Durable are MIA Kits and Retrofits ?
A.
MIA Kits are extremely durable, because we use
mostly glass and carbon fiber composites, metal and tough co-polymer
plastic parts, as required, to make both our kits as well as our
retrofit products almost indestructible. All this, combined, allows our
products to withstand use and abuse, beyond what similar standard
mass-produced products offer.
Typical Assembly
Process with MIA Kits
Please read through this
area carefully, but also make sure to follow each Kit's
dedicated instructions.
1)
Inspect the kit
contents with the product descriptions and contents
information next to the specific product, in our site.
2)
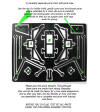
Computer Numerically Controlled (CNC) manufactured G10
Fiberglass Parts Trees have small bridges to support the
individual kit pieces. These need to be carefully clipped
with a small wire cutter, or scored with a hobby knife, or
in some cases can be clipped with a small nail clipper or
scissors. DO NOT break the parts with your hands as some
parts come in thin plates, as required for the particular
application, and these need to be carefully removed as just
described to retain part mechanical integrity.
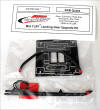
 Example from MIA S300 Upgrade Kit for the E-Flite Blade mCX
Helicopter.
3)
It is highly recommended that you, first!, test fit all the
parts to ensure proper alignment and, in particular,
orientation for proper product assembly. Because flat
fiberglass plate is cut with a router end mill (similar to a
round drill bit) it is impossible to obtain a perfect square
"inside edge" on a part, where tongue (rectangular) tabs and
groove (round hole) assembly is required.

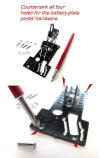
The best way to have the
parts "sit" or "fit flush" with one another is to slightly
"chamfer" or "countersink" the "groove" holes, with a
slightly larger than the hole diameter drill bit or
"chamfering countersink tool". Many times we at MIA
Micro-FLIGHT do this already for the user depending on the
particular kit.

4)
When satisfied with the fit and proper orientation of
the Kit parts you can go ahead and glue the joints by
spreading a thin bead of CA glue. We highly recommend that
you use the CA glue and Accelerator brand we offer. The CA
bottle has a thin tip and this is ideal for the assembly.
Keep in mind that a clogged CA glue bottle tip or one that
allows glue to flow too much will render a poor quality
joint. Do not use anything else for gluing unless we specify
such in our Kit instructions. In many cases, a disposable
toothpick is ideal to spread the CA glue along an assembly
joint cleanly. Use small clips to hold parts, while drying,
if you do not use an CA accelerator.
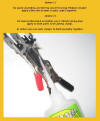
When using an CA Accelerator
spread it on one side of the part to be joined with a small
disposable brush or Q-Tip, or even a toothpick. try not to
spray onto the part, as this not only wastes accelerator
material but it spreads unnecessarily into the atmosphere.
Follow CA and Accelerator Manufacturer instructions and use
in a well ventilated area.
Example photos of typical Kit
assembly process.


If you have any
questions, we'll be happy to answer them via our
E-mail

